Pages

Showing posts with label cheese. Show all posts

Monday, January 16, 2012

E is for Enchiladas

After tackling poblano peppers in my paella, I feel more confident about broadening my pepper repertoire.  I've always loved jalapeños, but after getting some serious pepper burn on my hands (and face!) last summer while making a southwestern salad, I went through a pepper scare.  I thought jalapeños were the most accessible!  The easiest!  Now though, I understand that they're just the most popular and you can't accurately judge the hotness of any pepper until you taste it.  Those jalapeños made my hands burn for hours and no aloe gel, burn ointment, ibuprofen, or milk and oil soak eased my pain.  I was miserable!  And so I swore off peppers, other than the ever-friendly bell variety, until my hands and my heart healed.  You know what brought me back?  I ordered a black bean and corn chili relleno at Zocalo, one of my favorite restaurants downtown.  I let those brilliant chefs do the pepper chopping and handling.  My dinner was served with smoked tomato grits, pico de gallo, and cilantro-buttermilk honey.  It was seriously delicious and served as the exposure therapy that I needed.  


Now that the pepper scare of 2011 has come to an end, I've been experimenting with different varieties.  The poblanos were absolutely wonderful in my paella and so I decided to try another similar pepper: the anaheim.  I bought three anaheim peppers to include in roasted chicken and quinoa lettuce cups.  Peter thought they were delicious, but I was less enthused.  It wasn't the pepper flavors that bothered me; I would just rather eat lettuce cups in the heat of summer and they hardly seemed appropriate in January.  I should have known better.  


And so I tried again, with something warmer and cheesier.  I prepared a dish more comforting in the barren winter months: enchiladas.  I bought jalapeños with a fresh attitude and made my own ranchero sauce.  I delicately wrapped tortillas around black beans, chicken, and a mixture of cheeses.  I smothered them with the spicy sauce and baked them until hot and bubbly and then Peter and I devoured them.  


Black Bean and Chicken Enchiladas with Ranchero Sauce
adapted from Cooking Light, October 2011

  1. 2 tsp. olive oil 
  2. 1 c. chopped onion 
  3. 5 garlic cloves, sliced 
  4. 1 jalapeño pepper, stemmed, seeded, and diced
  5. 1/4 tsp. kosher salt
  6. 2 c. chicken broth
  7. 1 tsp. dried oregano
  8. 1 small jar (8 oz.) tomato sauce 
  9. 1/2 tsp. ground cumin
  10. 2 Tbsp. fresh lime juice 
  11. 1/8 tsp. ground red pepper
  12. 1 (15 oz.) can black beans, rinsed and drained 
  13. 2 c. (8 oz.) shredded cheese (I used white and sharp cheddar)
  14. 1 c. shredded chicken 
  15. Cooking spray 
  16. 12 (6-inch) tortillas
  17. diced cilantro
  18. light sour cream 
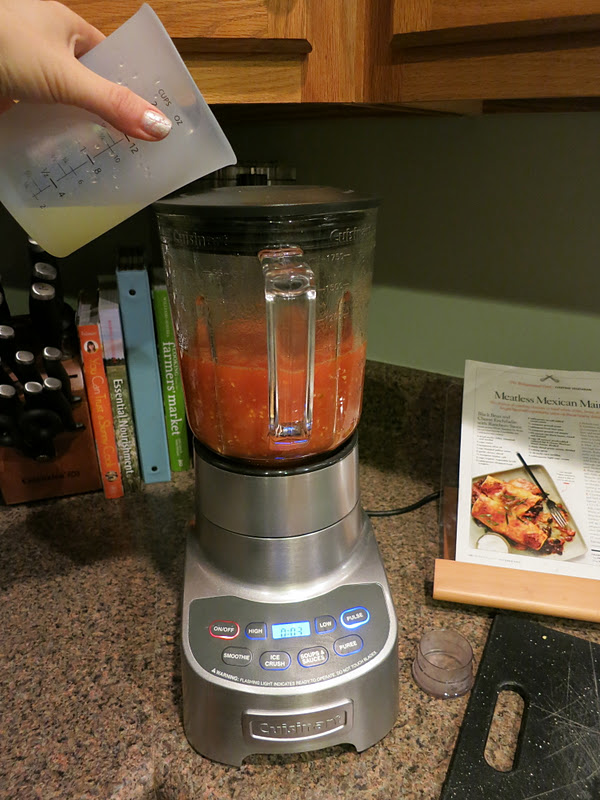
  1. Preheat oven to 400°.  Heat oil in a medium saucepan over high heat. Add onion; saute 1 minute. Reduce heat to medium; add garlic, jalapeños, and salt. Cook 5 minutes or until onions are golden brown, stirring occasionally. Add broth and oregano, tomato sauce, and cumin; cook 8 minutes or until thickened, stirring occasionally.  Pour onion mixture into a blender.  Remove center piece of blender lid (to allow steam to escape); secure lid on blender. Place a clean towel over opening in lid. Blend until smooth; stir in lime juice and ground red pepper.  Combine the beans, 1 cup grated cheese, and shredded chicken in a medium bowl.  Spread 1/2 cup sauce in the bottom of a 13 x 9-inch glass or ceramic baking dish coated with cooking spray. Warm tortillas according to package directions. Spoon bean and chicken mixture down the center of each tortilla; roll up. Place, seam-side down into the sauce. Pour remaining sauce over filled tortillas. Top with the remaining cheese. Bake at 400° for 15 minutes or until lightly browned. Sprinkle with cilantro and serve with sour cream and a salad.  


Saturday, December 17, 2011

S is for Sausage Cheese Grits

Today I want to share one of my all-time favorite breakfasts: sausage cheese grits.  It is absolutely perfect for brunch or a family breakfast with lots of people around the table.  Expecting company?  Do you want to try something other than French toast and breakfast casserole?  If you prepare this dish, I promise you'll win over the hearts those stubborn northerners who claim not to like corn grits!


Growing up, my mom used to present this steaming dish on Saturday mornings and we would wrap up the leftovers to enjoy all week.  It will be creamy and smooth the day that you first prepare it, but after some time in the refrigerator, it will become more like a firm cake that can be cut into squares and reheated for a minute in the microwave.  Don't expect too many leftovers though.  Everyone at your table will be asking for seconds!  


Peter likes to make this dish when we have a house full of company.  Trust me when I say it's just as popular around the holidays as it is in the heat of summertime at the lake house.  Oftentimes, we put this dish together at night before we head to bed so that we can just pop it in the oven in the morning.  It does require nearly an hour of cooking and resting time before you can serve it, so I'll admit I sometimes set an alarm to get up to put it in the oven and then I go back to bed for a while.  I usually serve this dish along with toast and a mixed fruit salad.  Enjoy!

Sausage Cheese Grits
from Judy Diehl

1 lb. pork sausage, browned and drained
4 c. water
1 tsp. salt
1 c. grits (not instant)
4 eggs, lightly beaten
1 1/2 c. (6 oz) sharp cheddar, shredded and divided
1/2 c. milk
1/4 c. butter, softened
salt and pepper to taste

Brown and drain the pork sausage.  Set aside.  In a saucepan, bring water and salt to a boil.  Slowly stir in the grits and reduce the heat.  Cook 4 minutes.  Remove from the heat and add a small amount of hot grits to eggs while stirring.  Return the grits, now mixed with eggs, to the saucepan.  Add the butter and stir until it melts.  Stir in browned sausage, 1 c. shredded cheese, and milk.  Stir until well mixed.  Pour into a greased 13x9" baking dish.  Sprinkle with the remaining cheese, salt, and pepper.  Bake at 350 F for 50-55 minutes.  Once you remove it from the oven, let it rest for about 10 minutes before serving.  

Variations:
This grits casserole is also fantastic with pepper jack cheese, spicy sausage, and a can of drained Rotel tomatoes with green chilies if you're looking for a Mexican flair to your breakfast.  

If you have swiss cheese and leftover spiral ham, substitute these ingredients for the cheddar and sausage. 


Friday, August 12, 2011

B is for Blue Cheese Apple Wraps

Every girl's got her summer go-to recipes for quick lunches and simple dinners.  During the hottest months in Virginia, I love pasta salads, microwaved corn on the cob, grilled pizzas loaded up with veggies, giant bowls of watermelon, fresh salads, and lots and lots of seafood.  Summer food is awesome.  

Today I'd like to share with you a recipe that's a smidge more complicated than a sandwich, but worth the extra ten minutes.  Everyone I've ever served these wraps to has absolutely loved them.  The apples give it the perfect crunch.  The cranberries give it a punchy kick.  The cheese spread makes it so creamy and decadent that you'll want to serve these for lunch, appetizers, tailgates, and showers.  Prepare to fall in love with a wrap! 


Blue Cheese Apple Wraps
adapted from Southern Living

  • 1 (8 oz) container light spreadable cream cheese
  • 2 tablespoons milk
  • 1/4 teaspoon garlic powder
  • 1/4 teaspoon onion powder
  • 1 (4 oz) package crumbled blue cheese
  • 1/2 cup chopped pecans
  • 1/2 cup sweetened dried cranberries
  • 8 (8-inch) flour tortillas
  • 1 Granny Smith apple, thinly sliced 
  • 4 cups baby spinach leaves

Stir together cream cheese, milk, garlic and onion powders.   Stir in crumbled blue cheese, pecans, and cranberries. Spread about 1/3 cup cream cheese mixture evenly over each tortilla. Top each tortilla evenly with apple slices and spinach. Roll up, and secure with wooden picks.  Keep chilled until ready to serve.  


Thursday, June 2, 2011

C is for Chicken Salsa Bake

I'm not a casserole queen, but sometimes I need an all-in-one dish meal like "salsa chicken."  Chicken smothered in chunky salsa, beans, cheese, and tortilla chips...can you object?  In college Peter and I regularly made all-in-one dishes like creamy chicken, chicken divan, or chicken broccoli and rice.  It was a great, cheap option when we were feeding a pack of hungry undergraduate wolves boys in his apartment, but now that it's just the two of us, I stray away from condensed soup and rice meals in favor of healthier ingredients.  This one slipped through the cracks because I'm a sucker for Mexican flavors.  I never think casseroles look very good on your plate, but they sure taste good and they're nice to take to school as leftovers for my lunch.  A hot lunch is a nice break from my ordinary turkey sandwich.              

This recipe came from the magazine Every Day with Rachael Ray, and in general I'm not a Rachael Ray fan.  She doesn't offend me, but I tire of the 30-minute meal mantra and most of her recipes don't make it into my my keep file.  This one did.


I used shredded meat from a rotisserie chicken, but you could certainly cook a few pounds of boneless chicken breasts and cut up the meat to use in this dish.  I added jalapeno, corn, garlic, and cilantro.  I lessened the amount of sour cream and cheese.  You could certainly use fewer tortilla chips; just use thin layers and only crush a cup at a time to see how far it can go.  Rachael Ray didn't cook the onion before adding it to the casserole, and I think this is a mistake.  The onions lose their potency when cooked in a skillet first with a touch of oil and it's worth the time.  An overly oniony casserole doesn't go over well with anyone.  If you wanted to make this a vegetarian dish, omit the chicken and use two extra cans of beans.  I'd suggest black beans or pinto beans.


Chicken Salsa Bake
adapted from Rachael Ray

1 onion, finely chopped
1/2 c. corn kernels 
1 tsp. minced garlic
1/2 jalapeno pepper, diced
2 lbs. shredded chicken
2 16 oz. jars salsa (try salsa verde or your favorite variety)
1 15 oz. can kidney beans, rinsed and drained
1/2 c. sour cream
3 c. crushed tortilla chips
1 1/2 c. shredded Mexican-style cheese
cilantro for garnish

Preheat the oven to 375 F.  In a large skillet, heat a tsp. of oil.  Add the onion until it becomes transparent.  Toss the corn, garlic, and jalapeno into the skillet for a couple minutes to gently brown on medium heat.  In a large bowl, shred your chicken meat and add salsa, kidney beans, and the onion corn mixture.  Gently stir in the sour cream.  Spray a 9x13" baking dish with nonstick spray and scatter a layer of tortilla chips on the bottom.  Top with half of the chicken mixture and a layer of cheese.  Repeat the layers and then top with some chips and cheese.  Bake for about 30 minutes, watching that the cheese doesn't burn.  Enjoy!


Saturday, April 23, 2011

A is for Appetizers

I believe some desserts and dishes should be left alone in their full-fat glory.  I'm thinking about treats like homemade ice cream, creme brulée, brownies, or a meal like fried chicken or macaroni and cheese.  These splurges show up on my menus rarely and usually just for a special occasion.  In my opinion, they're so much better when made with real cream, real sugar, butter, etc. that the low-fat-diet-friendly versions just aren't worth the time and effort.  They aren't delicious.  They just make you think about how much better the "real thing" is!  

Ellie Krieger, one of my favorite Food Network stars, classifies foods as either "usually"(like most vegetables, fruits, and lean meats), "sometimes" (like breads, dairy products, grains, and starches), or "rarely" (like fried foods, baked goods, and other sweets).  I like this way of sorting and cataloging because her strategy doesn't eliminate or ban any foods; she's just helping us realize that some foods can be eaten regularly and even in great quantities, while other foods should be treated like a special event that only comes around once in a while.    

In spite of my feelings about a few sinfully decadent sweets and unhealthy treats, I also enjoy finding ways to lighten up recipes.  I try to adjust things to move a food from the "rarely" category to "sometimes."  I read America's Test Kitchen, Cooking Light magazine, Skinny Taste, and cookbooks like Cook Yourself Thin to get ideas for lightening up dishes.  I've tried quite a few Hungry Girl recipes, but none have turned out very well for me, so I'd recommend the other resources if you're interested in adding more "sometimes" and "usually" foods to your plate.  

When I'm making changes to a recipe, if I can't swap out an unhealthy ingredient for something more beneficial, I'll try using less than a recipe calls for.  This strategy usually works for a casserole, a meat course, a vegetable side, or a salad, but I'd caution against altering a baking recipe too much.  Cakes, cookies, muffins, and breads are much more sensitive to ingredient ratios, temperatures, fat content, and the texture of the ingredients.  Just make those cookies and cakes the way the recipe calls for and savor a smaller serving.


Today I want to share two incredibly simple appetizers that you can serve this spring or summer and they're sure to be a hit.  Both recipes include a "usually" food (fresh, raw veggies) and a "sometimes" food (cheese).  Enjoy these snacks without guilt!
 

Stuffed Radishes
from Linda Strup

2 bunches of radishes
2-4 Tbsp. cream cheese
1/4 c. raw shelled sunflower seeds


Clean the radishes and cut a flat surface on each end so that they will stand upright.  Use a spoon to gently top each radish with a small amount of cream cheese or neufchatel.  In a 350 oven, toast shelled sunflower seeds on a cookie sheet until fragrant and golden (about 5 minutes).  Roll the cheese-topped end of each radish in sunflower seeds so they stick.  Serve immediately for best results.


Caprese Skewers
by Rachel

Cherry tomatoes
1 hothouse cucumber
mini fresh mozzarella balls
1/4 c. olive oil
1 Tbsp. balsamic vinegar
1/2 tsp. minced garlic
1/2 tsp. kosher salt
1/2 tsp. black pepper
1 Tbsp. finely chopped fresh basil

Use a vegetable peeler to scrape stripes along the sides of the cucumber.  Cut into wedges or cubes.  Skewer cherry tomatoes, cucumber, and mozzarella in a pattern onto small skewers (I cut my long skewers in half).  Mix the olive oil, vinegar, garlic, salt, and pepper in a small bowl and drizzle over the skewers just before serving.  Sprinkle with finely chopped basil.      


Sunday, April 3, 2011

C is for Cheese Plate

My favorite appetizer to serve for dinner guests is a cheese plate because it's quick and versatile.  People love it because they can mix and match different crackers, spreads, fruits, nuts, or other nibbles to find tasty combinations that are worth talking about.  A cheese plate can also be packed up into different glass dishes and carried along to a vineyard for a delicious snack that won't break the bank.  It can be a romantic treat if you do it right!
 

I can usually throw together an impressive-looking cheese plate in less than 10 minutes without turning on the oven or making much of a mess, so it's a go-to appetizer if your dinner course requires a lot of attention.  You can serve it in the kitchen while guests linger around and fix drinks or you can take it to the living room and people will naturally flock around it (and then you can have the kitchen to yourself for final touches on the main meal!).  

There are no hard and fast cheese plate rules, but there are a few guidelines for making a well-rounded platter than any guest will enjoy.  To be cheese-plate-ready, you need to keep a few things on hand in your pantry or fridge.  Plan to set out about three cheeses, one spread, three types of crackers or bread, one dried fruit, one fresh fruit, and a protein like nuts or a sliced meat.  This setup will give your guests lots of choices for pairing flavors and textures.  If you store a few spreads, nuts, crackers, and dried fruits in your pantry, you're more than halfway to a great appetizer.  
    
A little asiago goes a long way, so cut it into small pieces in advance

Great cheese plates have at least three varieties of cheese.  I like to include at least one hard cheese and one spreadable or crumbly cheese so that there are different textures on the platter to play with.  I aim to use different colors of cheese, so that there aren't three yellow hunks on the plate; it's more exciting to see a combination of white, orange, and maybe even green (like an herbed cheese).  I like to buy a unique variety like champagne cheddar or XXX sharp cheddar instead of just going for ordinary cheddar.  Folks like "regular" cheese on their sandwich, but not on a cheese plate.  Slice some of the cheeses in advance or put the proper tools with the tray and just cut a few pieces to serve as an example.  Try to use the tip of a knife to crumble hard cheeses like asiago into bite-sized pieces and put them in a small dish.  Consider labeling your cheeses with tags or a chalk sign.  Peter and I use a slate cheese board that we can scribble the names on.      
Dill havarti, sliced into triangles, looks very appealing

Choose a spread to feature, such as a local jam, preserves, honey, pesto, apple or pumpkin butter, pepper jelly, or maybe a roasted garlic and onion spread.  It's usually best to serve this from a small dish with a pretty spreader, but if it's a unique topping, you might want to serve it from the jar so that people will know what to expect.        

As far as crackers and breads go, don't overwhelm your guests with choices.  Just stack up and spread out a few of two or three different kinds.  Pick different shapes and textures to make it interesting.  I like to put crunchy breadsticks in a cup and spread a ring of multi-grain crackers around that.  You can also slice a small baguette and fan it out on the tray.  

Fruit and cheese go so well together, it'd be wrong to not include it on your cheese plate.  Apple is perfect every time, but I also enjoy serving slices or pear, cantaloupe, grapes, cherry tomatoes, or berries.  I like to set out at least one dried fruit like apricots, dates, figs, golden raisins, or cranberries.  While it's not a fruit, sliced cucumbers are also great on a cheese plate because people tend to use them in lieu of crackers.  I love seeing people get creative and "repurpose" food!  

Try arranging apple slices into a starburst

Dried dates

As a last option, you might want to add a protein like sliced summer sausage, pepperoni, salami, or prosciutto.  If you don't have a meat like this to serve, consider putting out a small bowl of nuts like pecans, pistachios, cashews, or even candied nuts or a spicy nut blend.  

Pepperoni or summer sausage pairs well with cheese and crackers

A cheese platter isn't hard to put together, and I like to think of it as an edible piece of art.  Peter and I sometimes make a cheese plate as our dinner and share a bottle of nice wine while we nibble away.  If you think a little outside of the box and you aren't afraid to try new combinations, you'll never get tired of this classic appetizer!               

Edible art!